Quick Start Guide
Getting up and running is easy! We’ve divided this guide into 4 main topics:
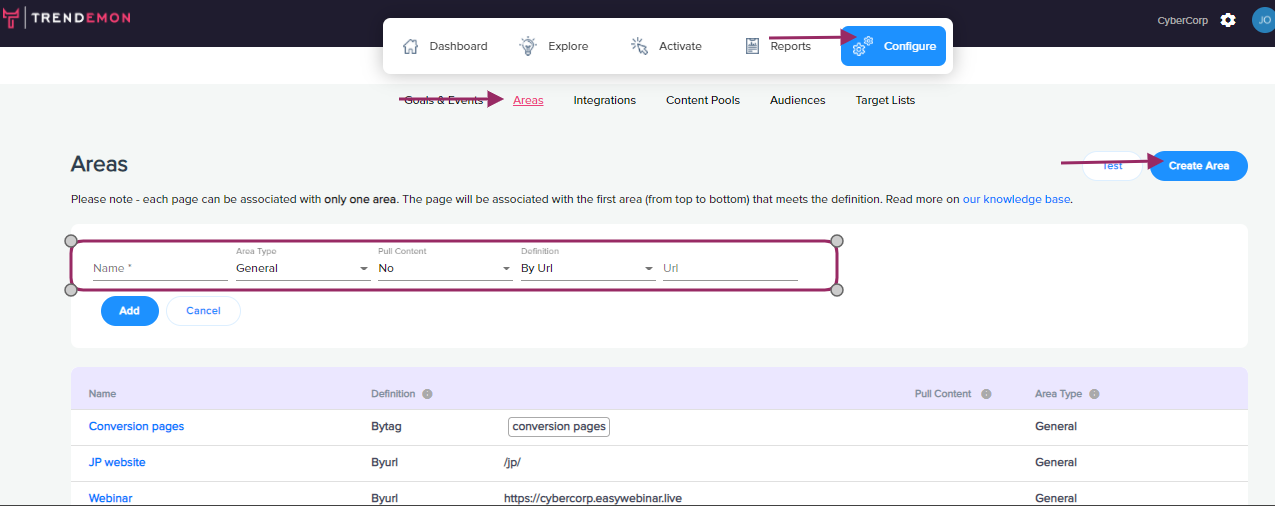
Areas
Divide your site into areas - based on the area type (blog, product pages, etc.) or based on topics .
To create areas : Select Configure-> Areas -> Create areas
-
- Choose a name for the desired area.
-
- Define it as a content area or a general area. This division is needed to ensure that the system can differentiate between, and give proper attribution to, the content sections. It’s recommended that you set up at least one area as “content”.
- Set 'Yes' if you want the pages in this area pulled to content recommendation. (for example blog pages) or 'No' if it is product pages or main website pages
Now you can choose between 2 options:
- Set up an area by URL:
- Select definition 'By Tag'
- Add the common part of the URL (example – ‘/blog’).
Note: Sort the URLs of the area in order so that the main URL is at the bottom of the list and its longest derivative is at the top. For example, “web.com/blog/section1” would be first, “web.com/blog” second, and “web.com” last on the list
- Set up an area by tag:
- Select the definition 'by Tag'
- Select the tag's from the drop-down list that you want to include in the area (these tags are coming directly from the HTML). You can read more on Auto-Tag here
- Another option is to create a tag-based area and then tag specific pages manually in the ‘scan results’ section (without the need for HTML tags on these pages). Tagging pages manually will put these pages in the desired area. (read more on manual Tag here)
Read more on areas here
Integration
- If you work with one of our integration partners, simply select it from the list to activate. This will allow you to set goals that involve tracking known users with your integrated software. For example: integrating SalesForce will enable you to view how your content impacts the status of any SalesForce lead.

To learn more about our different integrations click here
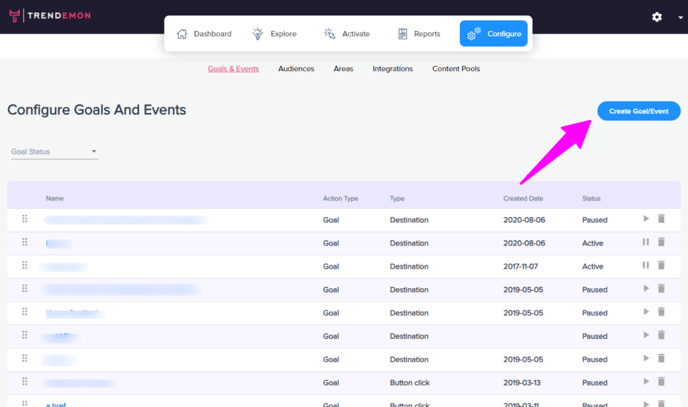
Goals & Events
- Goals are conversion points on your website or in the funnel of your MA or CRM program. Once these are set up, you’ll be able to see how content has impacted each of them. Goals can be defined as a destination (i.e. the user arrives at a “thank you” page after signing up) or as a pixel you can place anywhere on your website.
- Events are actions taken on your site that you believe help to engage and convert. Video views, social buttons, and gated content are examples of events. So, for example, it’s not your goal to gain video views, but it’s an event on the path to achieving your goals.
After settings up goals and areas, we will automatically start tracking the attribution path of your business goals. read more on how to set your business goals
Advance Settings
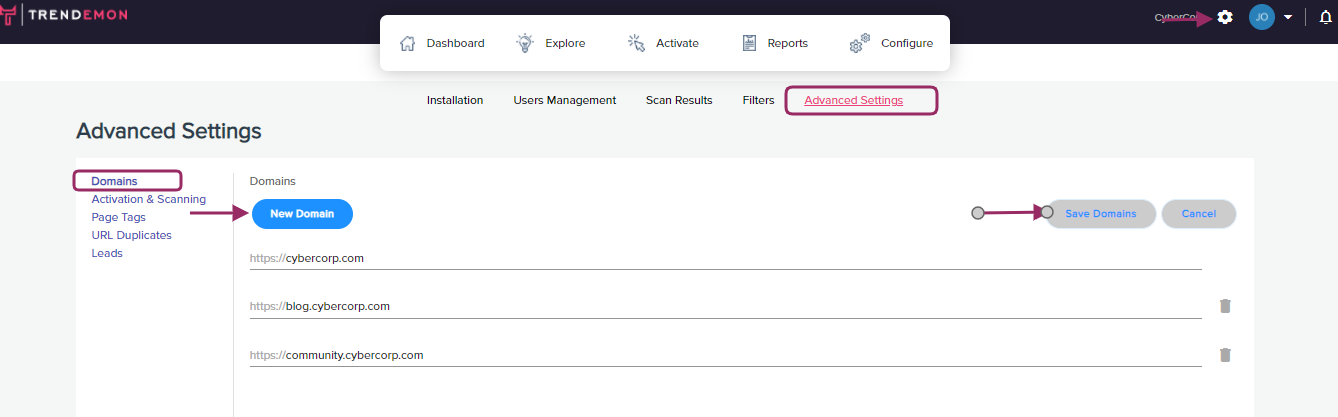
- Domain and subdomain
Once your account is created the main domain will be the first domain we scan if you have additional domains. simply add it to your domain lists (it may take 24 hours before you will see the pages in the scan pages ). add it without the 'www.' or 'https', For example, yoursite.com and blog.yoursite.com
Go to Setteings -> Advance Settings ->Domain - > new domain -> save domains.
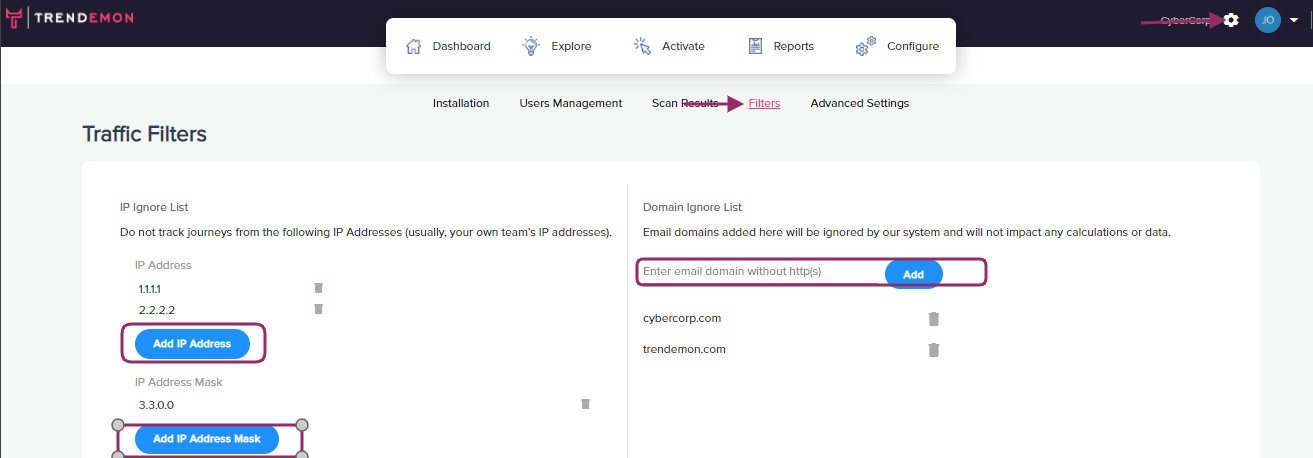
- Ignore traffic from your office IP address:
- Add your office IP address so that employee site visits won’t be tracked in the system and distort the data.
Go to Settings -> Filters -> add IP address or domain name
- Add your office IP address so that employee site visits won’t be tracked in the system and distort the data.