In this article, we will discuss all the options to create a campaign or offer.
The creative section is where you define the look and feel of the personalization unit.
You have 2 main options to design your creative: Design with AI and Design Manually.

Let's review these 2 options:
Design with AI
Our AI Creative Agent helps you design compelling promotional experiences with minimal effort. Provide the URL you want to promote, and the AI Agent will do all the rest—generating a fully styled unit with tailored messaging and design elements that match your brand and promotion goals.
No more starting from scratch—just drop in your promotion link and let the AI build the experience for you!
Here's how to use it:
- Start creating a new promotion campaign or offer
- Click the “Design with AI” section
- Type your promotion URL
- Select whether to upload a reference image for the design, or let the AI Creative Agent automatically design the unit for you
- Watch as the initial design appears instantly in the preview window
- Want changes? Just chat with the AI to tweak colors, copy, design elements, layout, and more.

After you insert the URL you want to promote, you will see 2 icons in the chat:
- arrow - to submit your prompt to the chat
- image - to upload an image and use it in the design

❗ Please note that this feature is just in its first steps, and we currently support only promotion campaigns or offers, and only slider, lightbox and embedded layouts.
Design Manually
Step 1: Choose the URL you want to lead your visitors.

If you want to track clicks on Trendemon units in other platforms (like Google Analytics for example), then you can add utm parameters to your destination URL to indicate that the visitor reached this page by clicking on a Trendemon unit.
Once you add the URL, hit the 'auto-populate' button and the title and image of the page will be added. If you don't want to add automatically the image and title you can add/edit the image and the titles in the customize section as described in 'step 4'.
Step 2: In this section you can select the layout of the unit. These included different variations of pop-ups, banners, embedded units and more. There are 5 different layouts you can choose from.
Lightbox - This will be displayed in the middle of the screen as a layover.

Slider - The campaign will be presented from the side of the page. You can choose if it will be presented from the left or right, and also the height.

Powerbar - The campaign will be displayed as a sticky bar at the top or bottom of the page

Embedded - The campaign will be embedded in the page. Note that to display the embedded unit you will need to add a <div> which you will get in the 'publish' tab.

Full-screen pop-up - The entire screen will be covered with the unit

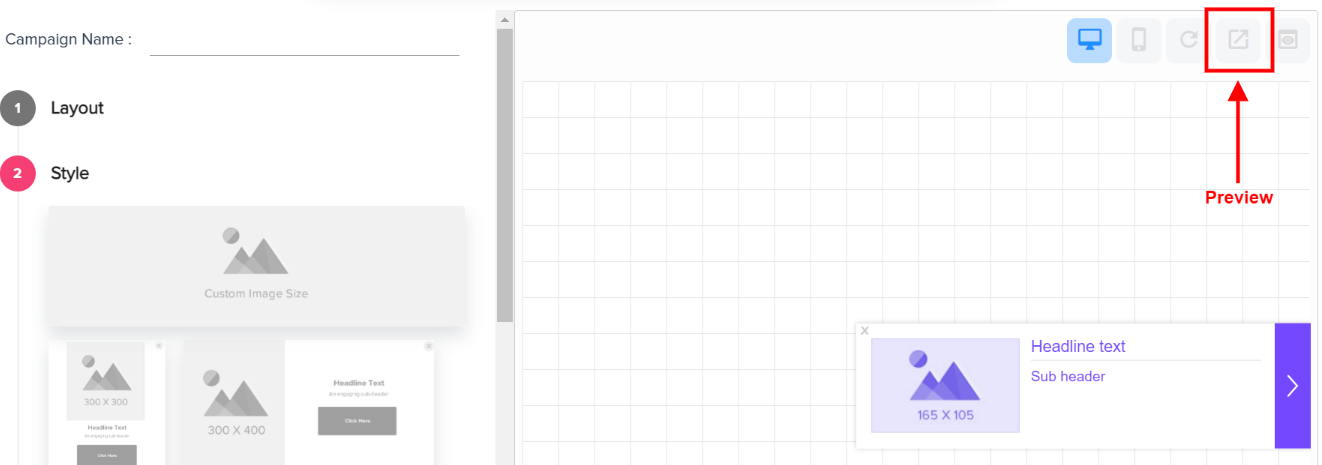
Step 3: Once you chose the layout, you can choose the style. Each style has a different image size and a place to add the copy. You can see the recommended proportion of the image size in the placeholder. In the example below, the 'slider' layout was picked with this style. If you want to see how it will look on a full page, hit the preview button.
Step 4: Once the layout and style are set, you can customize the unit by updating the design of different elements like: updating the text (of title, sub-title and button), updating font size, changing the colors (of text, background color and button color), customize the layout of the close button and more. You can also update other attributes by changing the CSS of the unit.

There are some differences when creating a form or survey unit but the basics are the same.